

I never thought I would resent a short piece of metal, but that’s what happens when you make a mistake packing for a long trip. Skip that sort of nonsense and take your best-packed bag ever on this year’s summer of travel.
You can judge for yourself from the video above, but I think I did a pretty good job cramming only the essentials into my WANDRD PRVKE 31L for a backpacking jaunt last summer. That being said, over the course of three months, I can assure you that you will absolutely know if you packed something you shouldn’t have. The couple of things I didn’t use managed to be in the way all the time. This brings us to tip number one, the biggie…
Fully understand your priorities and pack accordingly
This is the most important principle to guide effective packing. Even if you’re not working within such tight restraints, no one’s travel is enhanced by carrying around a bunch of stuff that won’t be used, so before you commit to your final pack-up, take a long, hard look at what you realistically want to experience while you are on the road. Don’t let emotional packing get the better of you!
As a fine art photographer, my wife devoted fully half of her pack to a gear bag. It meant fewer clothes to cycle through, but the results were well worth doing laundry a little more often! As more of an “imaging enthusiast,” and in light of what we would have access to collectively, I actually left my ILCs at home and brought gear that would complement her more traditional setup (more on that in a moment). It was a hard choice, but ultimately the right one.
So, pick a priority and stick to it mercilessly when you’re packing. If you want to get great images, pack your kit first and squeeze in luxuries like clothes around it. If you want to shoot video, a quality microphone might be a better investment of space than an extra swimsuit. If you’re more interested in snapshots to remember a relaxing vacation by, a quality point-and-shoot might be all you need—and that’s okay!
Consider specialty gear
There’s no universal standard for what the best travel record is, nor a universal gear-bag to make it happen. The more specific your vision, the better you can prepare yourself to capture it.
The photographer’s eye is exceedingly important, and even if we were shooting with the same exact kit, Macey and I could have captured very different pictures. However, I chose to complement my wife’s α7R II kit with radically different gear to maximize the breadth of our combined memories. I squeezed in something from just about every other category, which was crazy but illustrative for the purpose of this article. Consider the following:
- a Mavic drone to get aerial shots, when legal;
- an Action Cam for on-the-go video and water shots (a rugged point-and-shoot would be another great choice for the same need);
- a large-sensor point-and shoot to cover the basic “walking around” need (in my case the RX100, but other great examples are the Canon G7 X II, Panasonic Lumix LX100 II, and Fujifilm X100F);
- a pro audio recorder, which was ideal for capturing a record of bands we saw without eating up all of my memory on grainy, dark video, as well as for providing high-quality field recordings to sync with later productions.
It seems like a lot, but all of that took up less space than the aforementioned full-frame ILC kit. Narrow your focus as much as possible, but take full advantage of the continued miniaturization of high-tech to bring everything you really will use. (I don’t regret bringing any of that, for the record!)
Optical options

For the many folks who decide that an ILC is the right choice, the same holds true for lens choices. For simplicity, an all-in-one is the classic travel choice. For trips like safaris, however, it might be worthwhile to consider a dedicated telephoto lens for longer reach and higher quality at that distance. Don’t forget UV and/or polarizing filters to protect your lens and make sure that you get glare-free photos. (More on polarizers here.)
Defining what you want to do is the biggest hurdle. After that, it’s all about refinements! Enjoy the following personally-tested nuggets of knowledge.
Pick the right bag; use every pocket
One of the reasons I mention the WANDRD PRVKE 31L is that it has about a million secret pockets—one of the big reasons I wanted it myself. Spots tailored specifically for a passport, laptop, and tablet or notepad as well as little pockets to keep a variety of small items easily-accessible made living out of this bag absolutely efficient.
Of course, that’s a pretty commonly-desired feature, and there are many equally-organizable bags. Check out our huge selection here, or—even better!—come into any store and feel them out in person. Like a wizard and a wand, sometimes it is the bag that chooses the photographer.

Keep it safe: Padding
Packing is only effective if your stuff is usable on the other end. Wrap sensitive and/or easily-scratched gear in a protective layer to avoid a regrettable situation. Specialized wraps like these options from Tenba and ProMaster are ideal, but items of clothing or those hotel shower caps work well in a pinch. Provided you’ve got a layer of padding/odor protection, stuffing your shoes with other items is a great space-saving hack that does double duty by providing a protective shell for breakable items. Bonus shower-cap trick: cut off a small piece of cap (or any thin plastic) and put it in between screw-top bottles and their lids to prevent disastrous leaks.
Keep it together: Packaging
After breakage, inaccessibility is the greatest enemy of effective packing. Thin organization pouches like the Go Travel Packer allow you to keep small items from migrating throughout your bag constantly as well as compress squishy items like socks into a smaller, more organized space.
Repackaging small quantities of sundries like medicine, toiletries, and tape lets you get all of their advantages with almost none of their bulk. Electrical tape can be particularly useful for minor repairs (like when I snapped one the landing feet on my drone) and for hiding brand names on black gear when you want to minimize the attention you’re drawing. Roll a foot or two around a nail or pen and you’ll have all you could possibly need for travel!
Dry gear is happy gear
Make your internal organizers work double duty by stuffing your dry bag with smaller items when it’s not needed for its intended use. If you don’t want to pack a dry bag, make sure you at least bring a rainsleeve! It’s a small investment for a lot of protection. A trek towel’s not a bad idea either. I have one of these clipped onto my backpack at all times, and it’s come in handy both for clearing unexpected rainfall and for showers with limited amenities.
Wily wires
Cable management is especially important, because letting them twist around willy-nilly significantly increases their chance of failing. A dedicated cable management bag, twist ties, and/or recycled hard cases (from glasses, for example) will help keep you from a desperate hunt for a charging cable in unfamiliar territory.
Aside from cables, you’ll need power too. If you’re going to run a risk of being away from the big power grid, be sure to bring a tiny power grid with you so you don’t miss The Shot. If your camera can charge via USB, a regular power bank will do, but if you want to power it all, check out the Omnicharge banks, featuring an honest-to-goodness AC output and chargeable via standard DC cigarette-lighter outlet.

Caps & straps
Lens caps are as prone to growing legs as cards & cables are. Reaching into your bag and pulling out a capless lens often means choosing between risky photography and missing a great shot! Fortunately, keeping the former in line is as easy as throwing a lens cap leash on each lens.
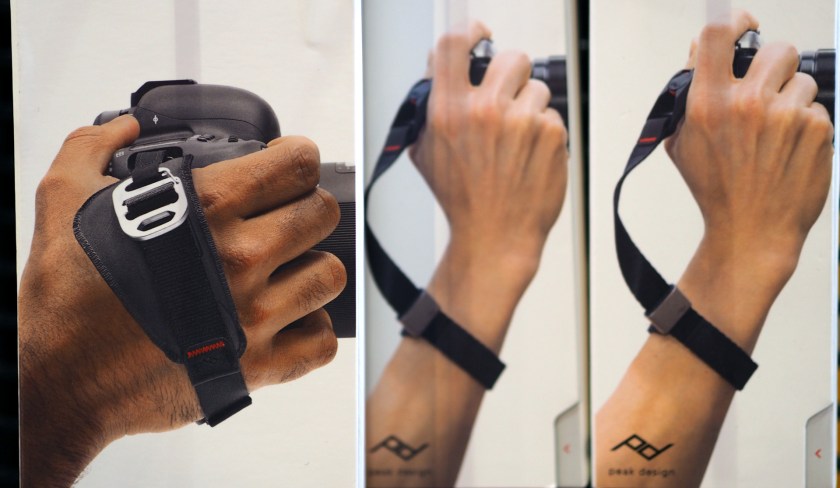
For the camera itself, it’s worth considering a change from the strap that came with the camera. Hand-straps and wrist-straps offer unique benefits over the basic options and save a surprisingly large amount of space in your bag.
Small & stable
Take the space you save on a bulky strap and reinvest it in keeping your camera under control while you’re using it as well as while you’re carrying it. A standard tripod is an awful lot to carry around, but a wide variety of travel tripods exist. Cut-down versions like the tiny Manfrotto Pixi work wonderfully for quick group shots that don’t exclude anyone or on-the-fly long-exposure work. If you have a little more room to spare, a full-size foldable like the ProMaster XC522 is another great option. For the ultimate in flexibility, literally and figuratively, the JOBY GorillaPod comes in a size for every camera and can be woven into any packing scheme.

No memory, no magic
Of course, it goes without saying that you ought to make sure you bring more than enough memory, if nothing else! A less common tip that’s no less important? Organize your memory cards. There’s nothing worse than being out of space and having to unpack your entire bag to find the next dang card… only for it to be one that’s already full! A card wallet is an indispensable accessory, and the right one for you surely exists, whether that means slim, waterproof, safety-corded, or individually-sorted.

This side up?
Once you’ve decided on a final packing list, make sure it all goes in sensibly. Put heavier and more durable items at the bottom to make sure your bag stays stable and your goods unbroken.
Share your own suggestions!
Any hot tips you think we missed? Share them on our Facebook, Twitter, or Instagram with the tag #mymikescamera to make everyone’s lives better!